 Imagination In Colour UK Nail Polish Blog
Hello everyone! It’s getting very close to Christmas! I hope whatever you celebrate, you are having a great time of year. I was kindly sent two sets of Nail Strips by OMG Nail Strips, who are a US brand committed to bringing beautiful, affordable nail designs to everybody in the simple form of the nail wrap/nail strip. I’ve reviewed a couple of nail wraps from other brands before now, and I have to say these are my favourite so far.
I firstly want to mention that OMG Nail Strips ship internationally, so this is accessible for those of us in the UK too :).


Look out for the other set you see here in another blog post soon!

As you can see, the strips come all attached to each other, with millimetre measurements for each nail wrap. There is a good range of widths, as well as the wraps being very nice and long too, so it caters for a lot more of us than some other nail wrap brands I’ve tried (which can sometimes be too short).
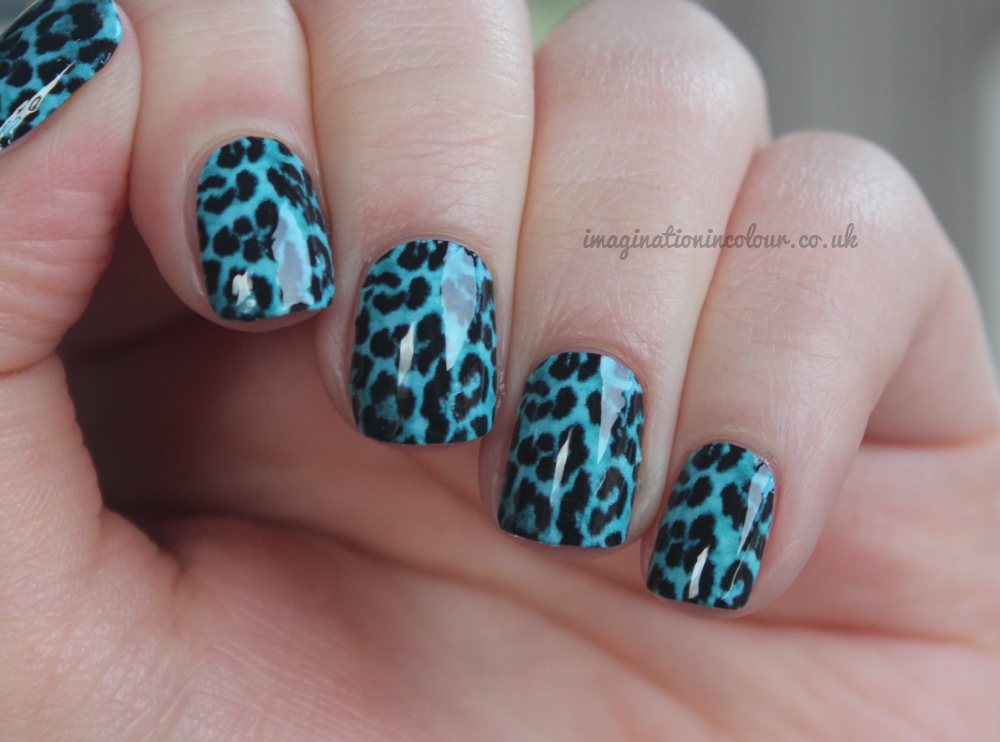
Today I am showing you the Blue Leopard Nail Polish Strips.
Instructions (paraphrased!):
- Soak your hands in warm water for about 5 minutes, dry and push back cuticles. Remove any excess skin around the nail bed. – I didn’t actually do this one as my nails are in *okay* condition.
- Select the appropriate size of nail strip that will fit edge to edge on the nail. Trim off any excess with nail scissors.
- Peel off clear plastic coating (from the top), then remove the white backing. – This can be fiddly!
- Start by placing the round end of the nail strip by the cuticle. Smooth the strip along the base of the cuticle and towards the tip of the nail. Make sure to smooth out any bubbles or bumps, and tuck the end of the strip under the end of the nail. – I found that I could pull the strip up a little if I had any unwanted bumps and reapply that area.
- File away any excess nail strips by filing at a 90 degree angle to the end of your nail, in a single direction, from the top to the bottom.
- Apply topcoat and wait for it to dry.
You can read the detailed instructions here.
I’m not sure why, I guess it could be something to do with the materials used to make the strip, but I found the application of this particular brand easier than some others I have used – in that it was easier to avoid unwanted bumps or air bubbles, and the sizes all seemed to fit my nails pretty well.
I also think you could probably get a few uses out of these for your toes – as the largest strip is certainly big enough for a big toe, and you could probably make some makeshift strips by cutting out the right shape and size from the other strips.
If I’m being completely honest, I am pretty terrible at keeping these on for any amount of time. While I love the look, I am terrible for picking at them and chewing on my nails when they’re on. I’m not sure why – it’s a bad habit!! But as for the longevity, I wore one hand with topcoat and one without – I will note that when I took a hot shower a few hours later, the nails with no topcoat were easier to peel off than those with. So I think the topcoat certainly helps in that respect. I would also suggest that you don’t submerge your hands under water for too long with these nail wraps, as in my mind it seems that that may affect the adhesive that holds them down.
Overall I think these make a great product, and make quick and easy nail art for those of us who don’t have a steady enough hand!
You can buy OMG Nail Strips from their site here, where they retail for $7.99 (which is currently just over a fiver for us in the UK). I believe they also have free shipping on the site too, which is pretty awesome!! 🙂 They are currently offering a 5 for $25 promotion with coupon code “5pack” and a 10 for $45 with the coupon code “10pack”. If you want to follow OMG Nail Strips they are on Facebook here, and Instagram here.
What do you think of these? Are you a fan of this ‘instant nail art’ solution?
